What a Hawley Retainer Should Feel Like (and What a Poor Fit Tells You)
A patient calls the front desk on day three. The Hawley rocks. It clicks when she talks. The team is debating remake or adjustment, and both options cost something: chair time, or lab turnaround.
The right call depends on what specifically isn’t fitting, and the answer is almost never visible from the patient’s side of the chair. Most fit complaints called in within the first 48 hours aren’t fabrication failures at all. They’re patients in normal adaptation, mistaking pressure for misfit. The ones that are real fabrication failures show up differently, in places a patient can’t see and a quick mirror check won’t catch.
This guide is written from the lab side. We’ll cover what a properly fitting Hawley actually does, the three components and the tolerances that decide whether it seats clean, what your patients should feel during adaptation, the six fit problems that come up most often (and what’s actually causing each one), and a working framework for chairside adjustment versus sending the case back.
What a Properly Fitting Hawley Retainer Does
A properly fitting Hawley retainer seats with gentle pressure, holds the labial bow against the front teeth with three to four contact points, and rests flush against the palate (or lingual surface of the lower arch) with full base contact. There’s no rocking. No persistent pinching at the molars. Speech adjusts within a few days. Removal takes intentional pressure, not a struggle.
That’s the standard. The clinical purpose underneath it is straightforward: hold the corrected tooth positions while bone and periodontal ligament remodel after active treatment. A Hawley does that through three balanced forces: labial bow tension on the anteriors, clasp retention at the molars, and full palatal or lingual contact distributing pressure across the arch.
When all three are doing their job, the retainer disappears into the patient’s day after the first week. When one of them is off, the patient feels it. Knowing which one is off is the diagnostic question for the rest of this guide.
The Three Components and the Tolerances Behind the Fit
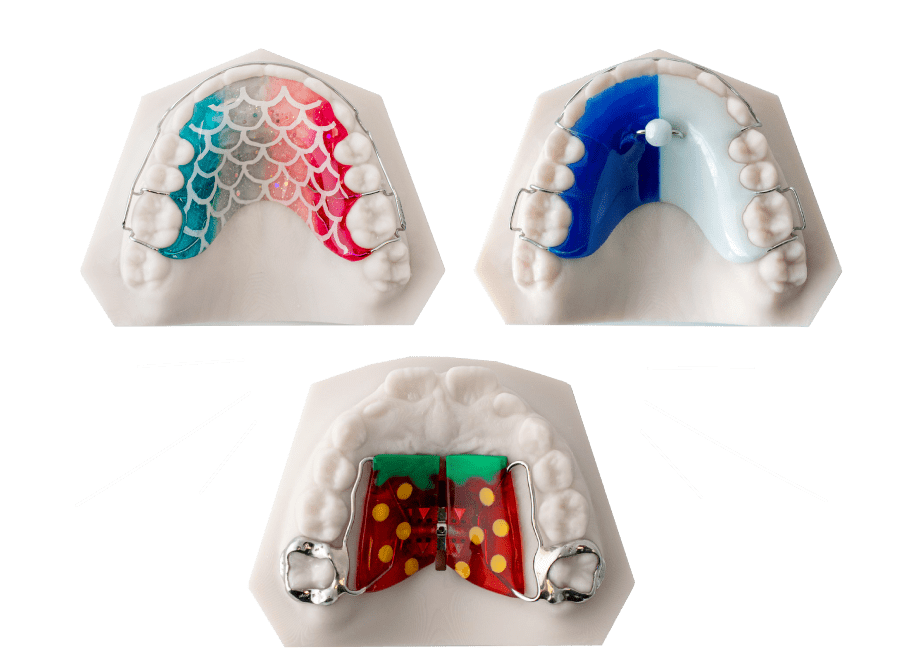
A lot of the wire-gauge information that gets repeated about Hawleys floats one number across every component. The labial bow, the clasps, and the optional springs all run different wire gauges, and the gauge choice matters for both fit and longevity. Here’s what we use at the lab and why.
The Labial Bow
The labial bow is the visible wire spanning the anterior teeth from canine to canine, with vertical adjustment loops typically placed mesial to the cuspids. On a standard maxillary Hawley, we fabricate the bow from .030″–.032″ stainless steel (0.76–0.81mm). The heavier gauge resists deformation under daily insertion and removal, holds tension over years rather than months, and gives the appliance enough rigidity to deliver minor corrective force at the loops when needed.
On the lower, we step down. Lower Hawleys typically use .028″ wire (0.71mm) because the shorter arch length doesn’t need the stiffness, and lighter wire reduces lip interference. If a patient reports a lower retainer that feels like it’s pressing into the lip, the gauge may be too heavy for the patient’s lip-line, not the bow geometry.
The bow should make light, even contact at three to four points across the anteriors. Not pressure that blanches the gingiva. Not float above the tooth surface with visible gaps. Loops should sit centered between the canine and first premolar, never touching tissue.
The Acrylic Base
The acrylic baseplate measures 2–3mm thick throughout and contacts the full palatal surface (or full lingual surface on lowers) without rocking. The thickness range matters because too thin loses rigidity and too thick changes tongue position enough to extend the speech adaptation window.
The base extends from immediately behind the central incisors to roughly the mesial of the first molars. Distal extension beyond that creates a posterior gag point on most patients without adding retention.
The Adams Clasps
The first-molar Adams clasps anchor the retainer through four point contacts per tooth: two on the mesial undercut, two on the distal. Standard clinical specification for the Adams clasp is 0.7mm hard stainless steel (.028″), the gauge C. Philip Adams specified when he introduced the modified arrowhead clasp in 1949 and the gauge most labs still use today. We run .030″ (0.76mm) on cases where stronger anchorage is called for: heavier patients, ortho cases with significant relapse risk, or molars with shallow undercuts that need every bit of retention available.
The bridge between the two arrowheads sits flush against the buccal surface; the wire ends bury cleanly into the acrylic without exposed sharp edges. Equal tension on both sides is non-negotiable. If a left-side clasp grips noticeably tighter than the right, the patient feels uneven seat pressure within minutes, and the retainer rotates on insertion.
| Component | Gauge / Thickness | Contact Points | Why |
|---|---|---|---|
| Maxillary labial bow | .030″–.032″ stainless | 3-4 across anteriors | Resists fatigue under daily insertion |
| Mandibular labial bow | .028″ stainless | 3-4 across anteriors | Lower force needed; reduces lip interference |
| Acrylic base | 2-3mm | Full palatal / lingual contact | Rigidity without altered tongue space |
| Adams clasps | 0.7mm (.028″) standard, .030″ for heavier anchorage | 4 per first molar | Anchor without tipping force |
Note: Tolerances above represent ODL standard fabrication. Spring Hawleys, Hawleys with bite plates, and active appliances run different specifications. See our Hawley retainer fabrication options for variants. For mandibular-specific anatomy, see how lower Hawleys differ in fabrication.
What Your Patient Should Feel in the First Two Weeks
A new Hawley creates noticeable pressure for the first 48 to 72 hours. Saliva production spikes within the first day, peaks around 24 hours, and normalizes by the end of the first week. Speech changes follow a predictable path:
- Days 1–3: Pronounced lisping on S and T sounds. Tongue is hunting for new space.
- Days 4–7: Lisping clears. Occasional slurring on longer words.
- Days 8–14: Speech returns to normal pattern. Patient stops thinking about the retainer mid-sentence.
Pressure markers run on a parallel curve. Days one and two feel like firm contact at the molars and even pressure across the palate. Mild gingival tenderness peaks around day two, fades by day four. By day ten the patient should be aware of the retainer only when inserting or removing it.
Reading aloud for 10–15 minutes a day accelerates speech adaptation more reliably than any other patient-side intervention. Patients who skip it can drag the lisping phase into a second week.
What’s not normal: sharp pain that intensifies rather than fades, pinching at the gums that doesn’t resolve in 72 hours, persistent rocking after the first day, or a retainer that loosens within hours of insertion. Those signals belong in the next section.
Six Fit Problems and What’s Actually Causing Them
This is the section where the lab side and the chairside view of “fit” diverge most.
Patients call the practice. They describe symptoms. The practice triages: adjust or remake. What gets missed in that triage, more often than the field acknowledges, is that the first 48 hours of any new Hawley are an adaptation period that produces symptoms that look like fit failure but aren’t. Sending those cases back for remake costs the lab money, costs the practice scheduling time, and trains patients to mistrust the appliance.
The flip side is also true. Real fabrication failures get accepted as “adjustment” cases and then get adjusted indefinitely while the patient quietly relapses. Both errors are common. Both are avoidable when the triage criteria are clear.
Here are the six fit problems we see called in most often, and what’s causing each one.
1. Rocks when seated. Likely cause: Real fabrication issue. The acrylic base isn’t making full contact with the palate or lingual surface, usually because the impression captured tissue under compression that rebounded after delivery. Test by pressing firmly on one side of the base while the patient bites. If the opposite side lifts, the base is rocking. Remake territory.
2. Loose within hours of insertion. Likely cause: Clasp tension issue. Adams clasps lose tension fast under repeated insertion and removal. If the retainer was tight at delivery and loosened within a week, this is normal early loosening, and a 10-second chairside tighten at the clasp bridges resolves it. If it was never tight, the clasp wire gauge was light for the molar morphology, and you’re looking at a remake.
3. Clicking sounds during speech or swallowing. This one is almost always adaptation. The clicking is the labial bow shifting position against the anteriors as the patient learns new tongue and lip patterns. It resolves on its own by day seven in over 90% of cases. If it persists past two weeks, check the bow position. It may be sitting too high or too low relative to the tooth midline.
4. Sharp pain at the gingival margin. Likely cause: Bow misalignment, not normal adaptation. The labial bow is sitting more than 0.5mm into the gingival tissue at one or more contact points. Persistent pain in this pattern beyond 72 hours requires bow adjustment, not patience. Run a finger along the bow inside the patient’s mouth. If it catches at any point on the gum line, that’s the spot.
5. Patient can’t tolerate the palatal base. Adaptation in 80%+ of cases. Persistent intolerance after two weeks suggests either base thickness above the 3mm range or distal extension past the first molar mesial. Adjusting the acrylic chairside can resolve the second. The first requires a remake with corrected base thickness.
For patients who genuinely can’t adapt (gag reflex sensitivity, severe palatal anatomy issues), switching retention type may be the right call. Vivid clear retainers or a lingual bonded retainer can do the same retention work for the right case.
6. Patient reports tooth movement under the retainer. This is the one to take seriously regardless of how recently the retainer was delivered. Hawleys hold; they don’t (usually) move teeth. If a patient reports actual position change after a few weeks in retention, something is off: either the patient wore the appliance inconsistently and is now feeling relapse, or there’s a force vector in the bow that’s actively moving teeth. Look at the bow position relative to each anterior, look at clasp pressure for tipping forces. This warrants an in-person check, not phone triage.
When to Adjust Chairside vs. When to Send the Case Back
The decision turns on whether the underlying cause is correctable by bending wire or trimming acrylic in chair, or whether it’s a fabrication issue that won’t resolve without rebuilding.
Adjust chairside when:
- Clasp tension has loosened from initial delivery (squeeze the arrow bridges; takes seconds)
- Labial bow needs minor repositioning (under 0.5mm) to clear gingiva at a single point
- Acrylic edge is irritating a specific soft tissue location (trim and polish)
- Bow tension is even but slightly light against one or two teeth (gentle activation at the loops)
Send back for remake when:
- Base rocks on the arch, confirmed by the side-pressure test described in problem #1 above
- Bow is more than 0.5mm out of position across multiple contact points
- Clasp wire was light at delivery (never had proper tension)
- Acrylic base extends past the first molar mesial creating posterior gag points
- Patient reports persistent tooth movement (problem #6 above)
The marginal cases (where you’re not sure whether it’s adaptation or fabrication) get easier with one question: when did the symptom start? Symptoms present at delivery or within 24 hours that don’t fade by day three are fabrication issues. Symptoms that started after a few days, after a few weeks, or after a specific event (dropped retainer, eating something hard) are adjustment or breakage cases, not remake cases.
When a remake is the right call, submit a case through Vivid with notes on what specifically failed. Specific diagnostic notes shorten the rebuild and let us check the same point on the next fabrication.
Care That Protects the Fit You Paid For
A well-fabricated Hawley fails fast under bad care habits. Thermoplastic and acrylic retainers begin to distort at sustained temperatures above 122°F (50°C), per Journal of Clinical Orthodontics research. Wires bend under casual handling. Storage hygiene matters more than most patients realize.
Quick reference for patient instruction:
- Brush after each meal with a soft-bristled toothbrush and lukewarm water (never hot)
- Soak weekly in a non-abrasive retainer cleaner; rinse before reinserting
- Store in a ventilated case away from heat sources, not wrapped in a napkin, not on a car dashboard
- Handle by the acrylic portion, not the bow or clasps
- Bring in for a fit check every 6 months
For full ADA-coded fabrication and replacement information, see ODL’s full appliance catalog or the ADA CDT codes for D8680 and D8681.
Frequently Asked Questions
How long does it take to adjust to a Hawley retainer?
Most patients reach full comfort within 10 to 14 days. The first 48 to 72 hours produce noticeable pressure and increased saliva. Speech normalizes by the end of week one for most patients, and tongue awareness fades by day ten. Persistent symptoms past two weeks warrant a fit check, not more adaptation time.
Can a Hawley retainer be adjusted after fabrication?
Yes. That’s one of its main advantages over thermoformed clear retainers. Labial bow tension, clasp grip, and acrylic edges can all be adjusted chairside without sending the case back. Loop activations on the bow can apply minor corrective force to anterior teeth that have shifted slightly during retention. Acrylic can be relieved at irritation points. Adams clasps tighten with a quick squeeze at the arrow bridges. The limit is structural. If the base is rocking on the arch or the bow is more than 0.5mm off across multiple contact points, you’re past adjustment and into remake. The advantage of an adjustable appliance only works when the underlying fabrication was sound to begin with.
What does a properly fitting Hawley retainer feel like?
Firm but even pressure. The retainer seats with gentle force, holds without rocking, and removes with deliberate pressure rather than a struggle.
How long do Hawley retainers last?
A well-cared-for Hawley lasts five to ten years before fatigue or breakage requires replacement. The most common failure points are bow fracture (from repeated bending), clasp loosening past the point of useful adjustment, and acrylic chips along the base edges. Annual fit checks catch most of these before they become emergency replacements.
Hawley retainer vs clear retainer: which fits better?
“Better fit” depends on what you’re measuring. A Hawley fits with intentional pressure points: the bow contacts the anteriors directly, the clasps grip the molars, the base contacts the palate. A clear retainer (like Vivid) fits as a continuous shell over every tooth surface, with no point pressure. Clear retainers win on adaptation comfort and aesthetics. Hawleys win on adjustability, durability, and the ability to apply minor corrective force. The right choice depends on the patient’s case complexity, compliance history, and whether the practice wants the option to adjust during retention. Many practices prescribe both: a Hawley for daytime, a clear retainer for night wear.
Get Hawleys That Fit on Delivery
A Hawley that pops in clean on the first try saves chair time, prevents remake cycles, and gives your patients a retention experience that doesn’t undo the work you put into their case. That’s what we build toward at ODL: appliances that don’t need explaining at delivery, fabricated in our FDA-cleared facility with named tolerances and accountability when something doesn’t seat right.
If you’re evaluating a new lab or want to talk through a tricky retention case, contact ODL to get started.