

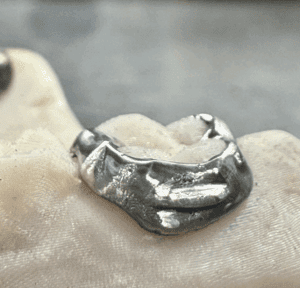
⚡ Why More Orthos Are Switching to Laser-Sintered Bands
If you still use traditional bands, you invest more time and energy than needed. ODL’s laser-sintered bands eliminate the mess of physical band fitting and slash your appointments from four to one—all while boosting lab precision and consistency.
Why switch?
- ➤ Pre-fit virtually—no more separator or try-in visits
- ➤ Clean, consistent fit = fewer remakes
- ➤ Stronger bonds with less cement cleanup
- ➤ Happier assistants and better workflows
- ➤ More efficient scheduling = more profitability
Over 60% of ODL clients now use laser-sintered bands—and they’re not going back.
🧪 Getting Started: What You Need to Know
Before bonding your first case, here are a few key principles:
- ➤ Bands arrive micro-etched from the lab – no sandblasting required
- ➤ They bond chemically, not mechanically—use the right cement.
- ➤ Less is more – over-priming leads to painful debonds
- ➤ Polishing is required after removal due to chemical adhesion, but a careful bonding protocol can reduce the amount of polishing.
- ➤ We’ve got your back – every technique is covered in step-by-step video walkthroughs.
🧴 Bonding Protocols: Choose Your Approach
We support and recommend two simple, predictable bonding protocols. Pick the one that fits your workflow:
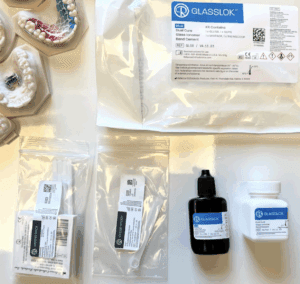
✅ Protocol 1: GlassLok PLGI
Ideal for: Moisture-friendly bonding, high retention, easier cleanup
Materials Needed:
- ➤ GlassLok kit (powder + liquid, blue or natural)
- ➤ Mixing pad + scoop
- ➤ Spatula
- ➤ Light curing unit
Steps:
- ➤ Dispense 2 level scoops of powder onto the pad.
- ➤ Add 4 drops of liquid from the dropper.
- ➤ Mix into a creamy, putty-like texture.
- ➤ Apply a thin, full coat inside the band.
- ➤ Seat the appliance completely.
- ➤ Light cure thoroughly, especially over the buccal.
- ➤ Allow full set time of 10 minutes (working time ~4 minutes).
🎥 Watch Old Bonding Protocol using Reliance dual cure
✅ Protocol 2: RelyX™ Luting Plus / GC Fuji ORTHO BAND
Ideal for: Fast workflow, minimal steps, quick cleanup
Materials Needed:
- ➤ RelyX™ Luting Plus Automix OR GC Fuji BAND cement
- ➤ Air syringe
- ➤ Light curing unit
Steps:
- ➤ Clean the tooth surface. No etch, pumice, or bonding agent is needed unless you have tiny crowns or a minimal area to bond.
- ➤ Load cement into the appliance using the automix tip or Fuji capsule.
- ➤ Seat the appliance immediately.
- ➤ Air blow mesial and distal to clear excess cement.
- ➤ Light cure for 5 seconds per side.
- ➤ Wait 4 minutes for full chemical cure.
🎥 Watch Bonding (Protocol 2): Bonding Demo – Dr. Moody
✂️How to Remove Laser-Sintered Bands
Removal varies slightly depending on the bonding protocol. The most important rule: don’t pull straight out.
🔧Removal for Protocol 1 (GlassLok)
🎥 60-Second Removal Demo
- ➤ Use posterior band remover with rubber bumper (Allure T-325 or T-326)
- ➤ Grip and twist your wrist—avoid direct pulling
- ➤ Expect more cleanup on buccal from the stronger bond
- ➤ Always polish post-removal to restore enamel smoothness
🔧Removal for Protocol 2 (RelyX / Fuji)
🎥 Full Removal Walkthrough – Dr. Moody
- ➤ Same instrument: posterior band remover with rubber pad
- ➤ Removal is slightly easier due to the less aggressive primer-free bond
- ➤ Watch for cement flash or excess left at margins.
- ➤ Always polish for comfort and a clean finish.
⚠️ 5 Common Mistakes to Avoid
➤ Priming both buccal, lingual, mesial, and distal – leads to over-retention. Only prime targeted zones, such as buccal and lingual areas to reduce strength, unless the clinical crown is very short.
➤ Using liquid etch (instead of gel) when bonding with glass ionomers. You may not even need to etch, but if you do (for example, the clinical crown is short and you want greater retention, just put a dab/small brush stroke on the lingual/buccal area)
➤ Skipping the flash cure – quick 1–2 second cure makes flash easier to remove.
➤ Bonding with bracket adhesives – wrong chemistry, wrong retention.
➤ Forgetting to polish leads to unnecessary sensitivity and roughness post-debond.
🤔 Still On the Fence? Let’s Address That
“These are harder to remove.”
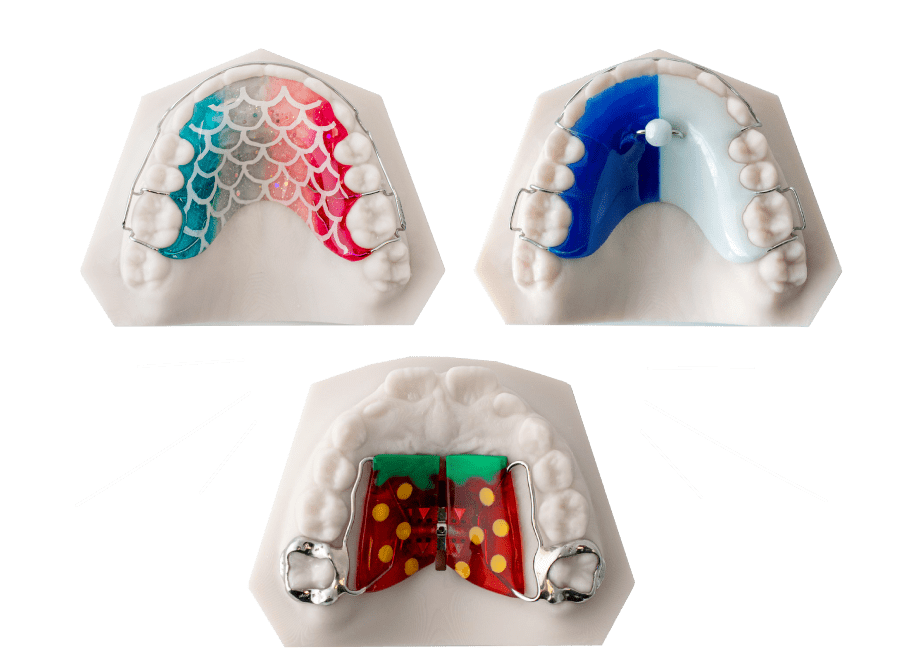
➤ Only if you over-prime or use the wrong technique. With buccal tabs and proper bonding, they pop right off. We can also design your band for easier removal by lessening the amount of metal on the buccal surface or creatging a “slit” in the band. Many doctors have seen great success in this option. See examples here:
“They cost more than traditional bands.”
➤ Yes—but you’re saving 2–3 appointments, minimizing adjustments, and eliminating try-ins. The ROI is real.
“I’m worried about open bites from occlusal coverage.”
➤ ODL designs bands digitally to avoid occlusal interference. Bites remain clean.
See examples here of our low-profile bands.
“What if my team doesn’t get it right?”
➤ That’s why we offer direct video guides, 1:1 clinical consults, and even live training if needed. If you need ODL to connect you with one of our expert clients, we will happily do so. The Orthodontic community is tight-knit, and we’ve always been able to find a good client willing to hop on the phone or video call with someone trying it for the first time.
🧠 Real-World Tips
- ➤ Short clinical crowns? Prime slightly more tooth surface for grip.
- ➤ Tall crowns? Use less adhesive and avoid full coverage to simplify removal.
- ➤ Use buccal tabs if buccal tubes aren’t included—request them with your order. (ODL automatically will add these tabs if you do not have buccal tubes on your script)
- ➤ Add a bonding QR code to our videos so that assistants can match the right steps.
- ➤ Snap pics of fit or removal if you’re unsure—ODL can review and coach.
___________________________________________________________________________
💵 Cost Comparison: Why It Pays for Itself
At first glance, laser-sintered bands may appear more expensive than traditional bands—but that’s only if you ignore the full economic picture.
|
Factor |
Traditional Bands |
Laser-Sintered Bands |
|
Band try-in visit |
Required |
❌ Eliminated |
|
Separator visit |
Often required |
❌ Eliminated |
|
Appliance seating |
Often adjusted chairside |
✅ Fully pre-fit |
|
Number of appointments |
3–4 |
✅ 1 |
|
Remake rate |
Higher due to seating issues |
✅ Significantly reduced |
|
Staff time (total) |
60–90 minutes/case |
✅ ~15–20 minutes/case |
Example:
Even if a laser-sintered band costs $40–$60 more, you recover that in:
- ➤ Eliminated appointments (~$300+ in chair value per hour)
- ➤ Reduced labor time for assistants
- ➤ Fewer remake delays or shipping re-dos
- ➤ Higher patient satisfaction = better referrals
If you’re looking to run a lean, scalable practice—this isn’t a cost increase. It’s a strategic upgrade.
_________________________________________________________________________
🧭 When to Use Laser-Sintered Bands—And When to Be Cautious
Laser-sintered bands are extremely versatile and can be used on virtually any fixed appliance—from simple expanders to complex Herbst setups. That said, there are a few clinical scenarios where extra caution is warranted—not because traditional bands do better, but because no band performs well under poor conditions.
✅ Ideal Use Cases
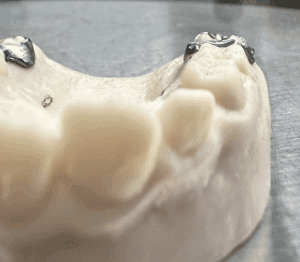
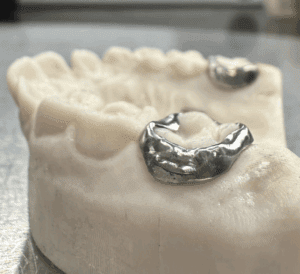
Laser-sintered bands work beautifully for:
- ➤ Standard RPEs and expanders (upper and lower)
- ➤ MARA, Herbst, and our exclusive Casper appliance: We recommend designing rests for Herbst appliances to help distribute forces—ask us about our Herbst design support.
- ➤ Lower lingual holding arches (LLHAs): Some doctors prefer traditional bands for lowers due to moisture isolation, but laser bands work just as well with glass ionomer protocols like GlassLok.
- ➤ Headgear tubes, quad helix, space maintainers, and more.
⚠️Situations That Require Clinical Judgment
These aren’t hard no’s—but they require you to think through timing, tissue, and eruption stage:
- ➤ Partially Erupted Molars
If the tooth is only partially erupted, or eruption is actively progressing, the band may not seat as designed if insertion is delayed.
📌 ODL recommends inserting within 4 weeks of the scan for optimal fit.
➤ Persistent Soft Tissue Distally
If there’s excess gingival tissue distal to the molar (often referred to as operculum), it can interfere with seating. In these cases, neither traditional nor laser-sintered bands will seat properly until tissue is managed.
➤ Delayed Insertions (Beyond 4 Weeks)
Waiting too long between scan and insertion—especially in erupting dentition—can lead to poor fit due to molar position changes. Always aim to seat within 4 weeks of impression or scan.
💪 High-Stress Appliances (Herbst, MARA, Casper)
Laser-sintered bands perform exceptionally well under stress, provided the correct bonding protocol is used. Protocol 1 (GlassLok) is often preferred for these cases due to:
- ➤ Higher chemical retention
- ➤ Better performance in less-isolated areas
- ➤ Consistency under force-loading conditions
📌 Ask about our Herbst appliance with occlusal rests for added support.
🛡️ Fit Guarantee
ODL guarantees the fit of all laser-sintered bands as long as:
- ➤ The scan is recent (≤ 4 weeks)
- ➤ The tooth has erupted sufficiently to match the scan
- ➤ Tissue interference is not present
If something doesn’t fit, we’ll make it right—every time.
📥 Ready to Try It?
You don’t need to commit fully—just try one case. Experience the difference in:
- ➤ Appointment reduction
- ➤ Chair time
- ➤ Assistant efficiency
- ➤ Patient satisfaction
📞 Need help picking the right protocol?
Schedule a 10-min consult with our team by texting 716-839-1900
ODL’s team is here to help. From virtual demos to supply recommendations, we make the transition easy.